 |
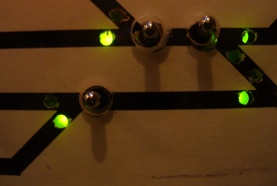
There is no money for at central station and other advanced gear right now, so until further it's just a simple controlboard. The controlboard for the shifts are made using (on)-off-(on) switches. The feedback is made of 2 LED's and 1 resistor pr. shift. A transparent plexiglass plate with holes covers the trackplan, which is printed on a sheet of paper. That makes it easy to add tracks. |
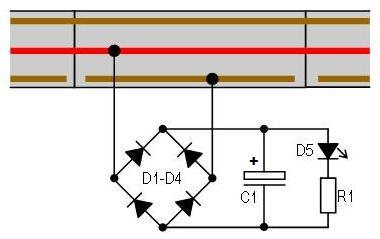  |
You can make a cheap feedback-unit yourself, if all you need is an indicator when a track is occupied.
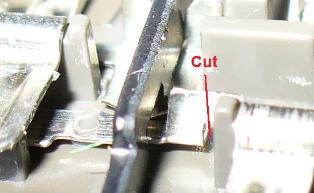
Especially if you have a hidden storage yard, you need to be able to see when a track is occupied. The connection between the two rails are disconnected by cutting the small bridge en both end of the track. Of cause you can attach a LED directly, but it will flicker because of the AC. Instead, I use a double rectifier. The diodes D1 - D4 can be any small (cheap) signal diodes. The LED D5 can be of any type, but I use a common (cheap) 3mm diode. The recistor should be fairly big, f.ex. 2.7KOhm (you just need it to indicate an occupied track, not illuminate the room!). Red LEDs are usually is very visible even at low current. The capicitor C1 is just for removing the remaining flicker. Any capicitor down to 1µF will do. Everything is mounted on a piece of Vero-board. The whole thing shouldn't cost more than 2 $ | |||
| Train stop | ||||
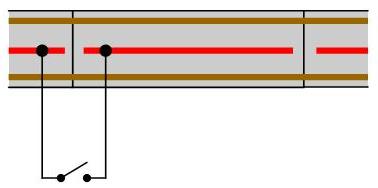 |
If you want to stop a train at a certain place, you can just disconnect the center rail from the adjoining tracks (use the Märklin 74030)
This method is only useful at hidden places, as the train stops abruptly and turns off light and sound. In a visible place you would typically use a braking module (see below). | |||
| Train stop with feedback | ||||
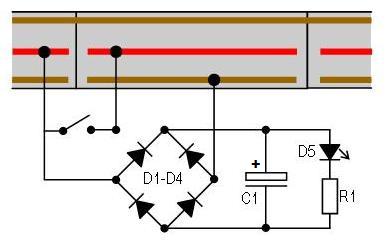 |
It is of cause possible the combine trainstop with feedback, so that it is possible to see if a train has stopped. See component list above. | |||
| Turnour with feedback | ||||
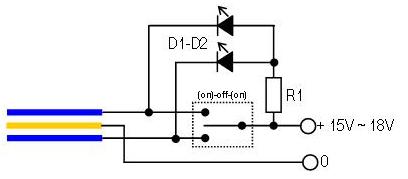  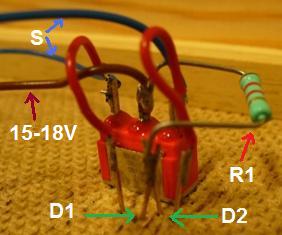 |
There are many (expensive) ways to control turnouts. My method costs less than 3 euro for each turnout. Märklin's control unit with feedback costs 22 euro for 4 turnouts, that's 5.5 euro each and you still have a poor overview over the actual positions of the turnouts. You can easily make a control board with track plan and feedback yourself. Märklin's electric turnout mechanisms has power cut-off in the outer positions. This is used to make the feedback. The feedback means that the control board will reflect the actual setting for the turnouts, even if they are operated manually. You need some switches with resting position only in the middle. They are usually named (on)-off-(on). I personally find it most logically if the LEDs are green and indicate the direction the train will drive, i.e. the opposite position of the turnout. The LEDs can be common (cheap) 3mm. The resistor should be 1-2KOhm (you just need it to indicate a direction, not illuminate the room!). You only need 1 resistor as the two LEDs is never lit at the same time. Doesn't use digital power for the turnouts. Use an auxiliary power-adapter. Any will do as long as it can deliver 15 - 18 volt DC 1,5 Ampere. The power supply dosn't need to be able to supply all your turnouts, as you normally only activate one at a time. Put a 100nF (nano farad) capacitor between + and - on the power supply. Coils, like in the turnout mechanisms, emit a short spike of high voltage. The capacitor short circuit these spikes so that they doesn't harm your LEDs. | |||
| Braking module | 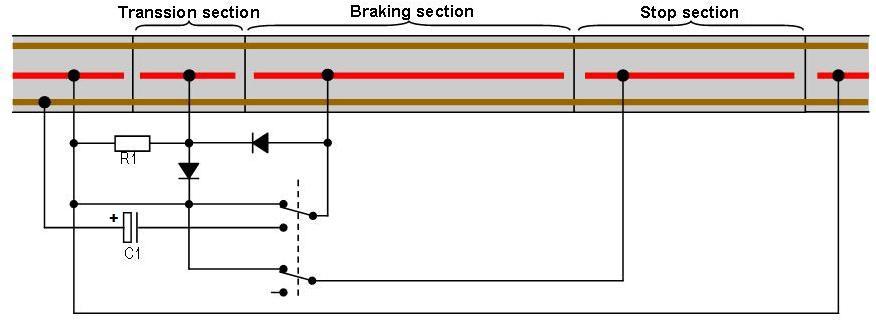 |
|
The schematics above will work on all newer Märklin. It also works fine on my two Roco locomotives.
The braking module works by converting AC into DC. When the decoder detects DC, it will decelerate according to the programmed value. The transission section is necessary to avoid short circuit. The section must be longer than the longest pickup shoe. You can use track 24077. Deceleration starts when the train enters the braking section and must be stopped before it reaches the stop-section. The stop-section is used to stop the train if it accidently over-runs the braking section. Without the stop-section, that would create a short circuit. The center track can be isolated from each other by use of the Märklin isolators (74030). The double contact decides if the train stops or drives through. The contact can be replaced by a relay, if you want other things to control the breaking, f.ex. a contact track. R1 = 1,2K 1/4 W , C1 = 200µF (micro farad) 25V, Diodes = IN1006 (or similar). The components can be soldered onto a Vero board. The whole thing need not cost more than 4 euro. |
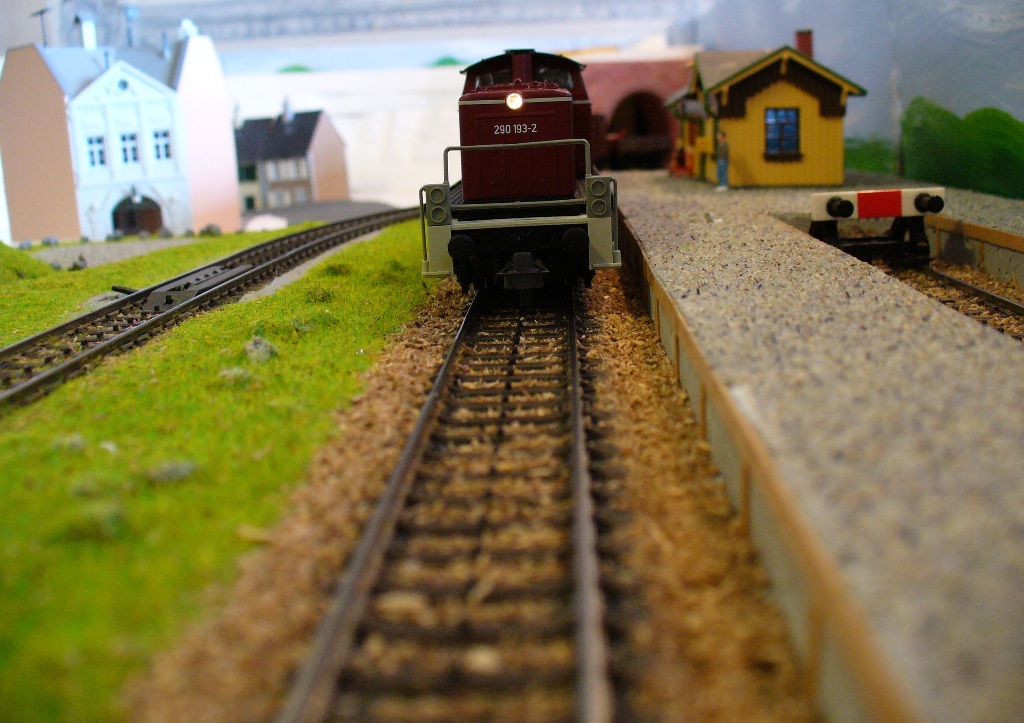 |
The tracks are wrapped in 10mm flamingo (Styrolit). It's light, cheap and easy to cut. It makes a little noise though. The ballast is common colored sawdust glued on to the tracks using white glue. Real ballast (of stone) would be nicer, but too heavy. |